Wouldn’t it be great to eat freshly baked goodies when you are out enjoying the great outdoors? Here is a homemade outdoor oven made from household items that you can take with camping or use in your own backyard.
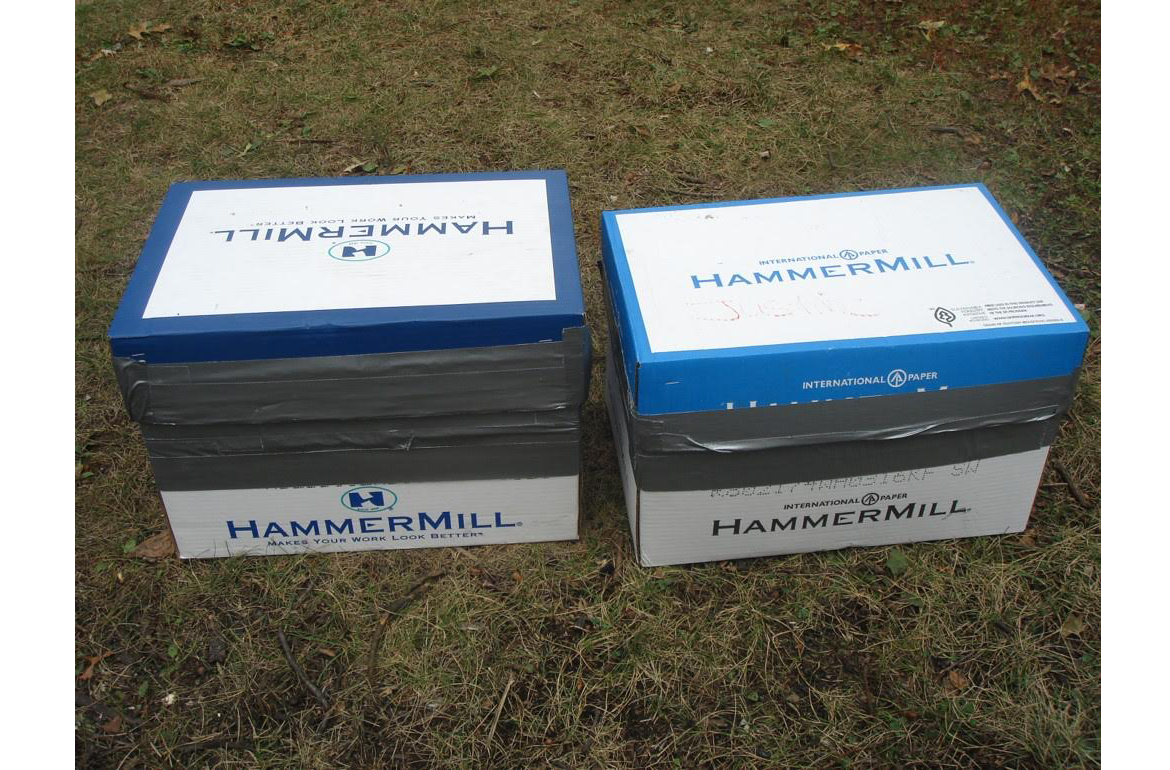
We started with a box used to hold multiple reams of 8 1/2 x 11″ office paper, heavy duty aluminum foil, scissors, stapler and duct tape. You can use any size box you want, depending on how large or small you want for baking your food items.

Leave a few inches of aluminum foil hanging over on the outside top edge of the long side of your box; carefully fold it down into the box along the inside, then across the bottom, up the other inside of the box and over the top outside edge. Again, leaving a couple of inches hanging over the outside.

Then cut smaller pieces to set inside the box in all 4 corners, having enough to fold over the top outside edge of the box and on the inside bottom of the box. Staple these four corner pieces along the top edge of the box, to help keep them in place.

Now put aluminum foil pieces on the 2 shorter sides of the box, hanging a few inches over the top outside edge and a few inches in the inside bottom of the box. For extra reinforcement, put 2 to 4 layers of aluminum foil on the inside bottom of your box.

You can also line the box by first putting the aluminum foil pieces in the 4 corners, then down the short sides of the box and finishing with covering the long inside portion of the box. The objective is to completely cover the inside of the box with aluminum foil to keep in as much heat as possible and keep the charcoal from touching the cardboard box. Use the method that works best for you.

Do a final check, making sure your foil is lying securely in your box, folded in tightly on the inside edges, corners and around the outside edge, then duct tape around the outside edge once or twice. Run your hand over the duct tape to firmly press it in place and secure to the box and aluminum foil.

Now you’ll need to line the inside of your cardboard box cover, in the same manner that you did the box. Here we placed aluminum foil in the 4 corners, then lined the 2 short sides and stapled the corners in place.

Now set in the aluminum foil to line the inside of the cover top, sides and hang over a couple of inches on the outside. Make sure your foil is lying securely in the cover, folded in tightly on the inside edges, corners and around the edge, then duct tape once or twice, around the outside edge. Run your hand over the duct tape to firmly press it in place and secure to the box and aluminum foil.
Your baking oven for your outdoor cooking is now ready to use.

I took this picture in the morning when setting up for a day of “Outdoor Cooking” with our newly made cooking oven. Fresh snow had just fallen the night before and it was a crisp morning for us to enjoy! Once we collected firewood and started cutting it into campfire size pieces, we were warm in no time!

Locate a fire ring and start your campfire. Once you have hot ashes and coals, place your charcoal briquettes in the hot campfire coals for around 20 minutes. The oven will take about 8 to 10 briquettes for baking items like cookies, so plan to place about 12 briquettes in your campfire for each oven you have, as you’ll want to have extra coals ready if you need more heat in your oven.
You can also make pizza’s in these ovens. Just add a few more coals if you are cooking a food item like pizza, to bring up the temperature.
You can set an oven thermometer inside the oven, if you want to keep tabs on the inside oven temperature.

Once your briquettes are grey and chalky looking, remove them from the campfire with fireproof oven mitts, tongs and place them in a metal container, to transfer them to your oven location. Place them around the bottom of your box to evenly distribute the heat. Set 4 clean empty tin soup cans, with labels removed (or 4 similar size cans all of the same height) in the box as shown. (This picture was taken after a couple of baking sessions, so there are extra coals.)

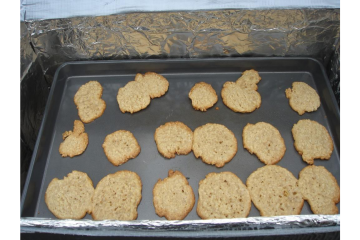
Set your cookie sheet, cake pan or muffin pan on the tin cans and gently set the box cover over the bottom part of the box. Don’t press down too hard on the cover, or it will make it difficult to remove. The top just needs to cover over the top outside edge of the bottom box.
After about 10 minutes you should start seeing smoke and steam seeping out the sides of the oven, lift off the cover a little to check how your food is baking. If it does not appear to be hot enough inside, add a couple more coals to the bottom of the box. Keep checking until your food item is done.

If you touch the outside edges of the box, you will feel the heat from the coals.
This photo was taken on Sunday morning when most of the snow had disappeared. We set the ovens directly on the ground.

You can make your oven with a “Peek Hole” in the top, to avoid losing heat when you remove the cover to check on cooking status. You can simply cut an opening in the top of your cover on 3 sides, (4th side will act as your hinge). Make sure you line all inside areas with aluminum foil, to avoid your box from catching on fire. One adult leader I spoke to advised they had made a similar homemade oven and had cut out the top of the box cover and replaced the top with a clear cooking bag to give them a view, without removing the cover.
You could also just line your “Peek Hole” with a clear cooking bag, to retain more heat inside the oven, when checking for baking status. As you can see there are many options on how to create your oven; if you like the basic concept, experiment and see what works best for you and your family.
Here is another recipe you can try:
Caramel Rolls
Put a generous layer of butter in the bottom of an 8″ x 8″ pan. Sprinkle brown sugar on top of the butter. Place bread dough rolls in pan. Bake for approximately 1/2 hour in a box oven that has 6 to 8 coals in it. (For a variety, add cinnamon and nuts).
Enjoy your adventures in the great outdoors!
- How to Make Eggplant Ice Cubes - October 23, 2017
- Keeping Parsley Fresh - July 26, 2017
- Learn How to Clean Potpourri - July 25, 2017


